A Complete Guide to Window Tinting: Choosing the Right Film & Installing It Like a Pro
- David Michell
- Nov 7, 2025
- 3 min read

Car window tinting is one of the most cost-effective upgrades you can make to your vehicle. Not only does it enhance the overall look of the car, but it also improves driving comfort, protects the interior from UV damage, and increases privacy. Whether you plan to install the tint yourself or seek help from car window tint specialists, understanding different film types and the installation process will help you make better decisions.
In this guide, you’ll learn the main types of tint films available and how window tint installation works — step by step.
What is window tinting?
Window tinting is the process of applying a thin film to the inside of a vehicle’s windows. These films are designed to reduce heat, protect interior surfaces from UV rays, and improve privacy. Some films also improve safety by holding shattered glass together in an accident.
Many car owners choose window tinting for aesthetic reasons, but the functional benefits are just as important.
Benefits of tinting your car windows
Temperature control: Tinted windows help reduce heat inside the vehicle, keeping the interior cooler on hot days.
UV protection: High-quality films block harmful UV rays that fade upholstery and can cause skin damage.
Increased privacy & security: Tinting makes it harder for people to see inside your vehicle, helping protect valuables.
Glare reduction: Tints reduce sun glare and headlight reflections, improving visibility and reducing eye strain.
Interior protection: Your dashboard, seats and trims stay looking newer for longer.
Types of window tint film
When choosing a tint, it’s important to understand the different types available. Films vary in price, durability, appearance and performance.
1. Dyed film: Dyed film is the most budget-friendly option. The film contains a layer of dye that absorbs sunlight and reduces visible light.
Best for drivers who want a tint for appearance rather than maximum heat reduction.
Pros:
Affordable
Provides a darker shade for enhanced appearance
Cons:
Less effective heat reduction
Dye may fade over time
2. Metalised film: Metalised films use tiny metal particles to reflect heat and reduce UV rays.
Pros:
Strong heat reduction
Durable and resistant to tearing
Cons:
Metallic coating may interfere with radio or GPS signals
3. Carbon film: Carbon film contains carbon particles that block infrared light without using metal.
Pros:
Excellent heat and UV protection
Won’t fade over time
Sleek matte finish
Cons:
More expensive than dyed or metalised films
4. Ceramic film: Ceramic film is the highest-quality option available. It uses advanced ceramic particles and offers the best performance without interference.
Pros:
Superior UV and heat rejection
No signal interference
Extremely durable and long-lasting
Cons:
Highest cost — best installed by car window tint specialists
How to tint your car windows (DIY guide)
Although professional window tint installation delivers the best results, some people choose to tint their windows themselves. If you're going the DIY route, patience and precision are key.
Here's a simplified step-by-step guide:
Step 1: Clean the windows thoroughly
Any dust, dirt or grease will cause bubbles in the film. Use a lint-free cloth and glass cleaner to ensure the surface is spotless.
Step 2: Measure and cut the film
Place the film against the outside of the window and cut it roughly to size, leaving a little excess around the edges.
Step 3: Prepare the inside of the window
This is where the film will be applied. Spray a soapy solution to allow the tint to slide into place.
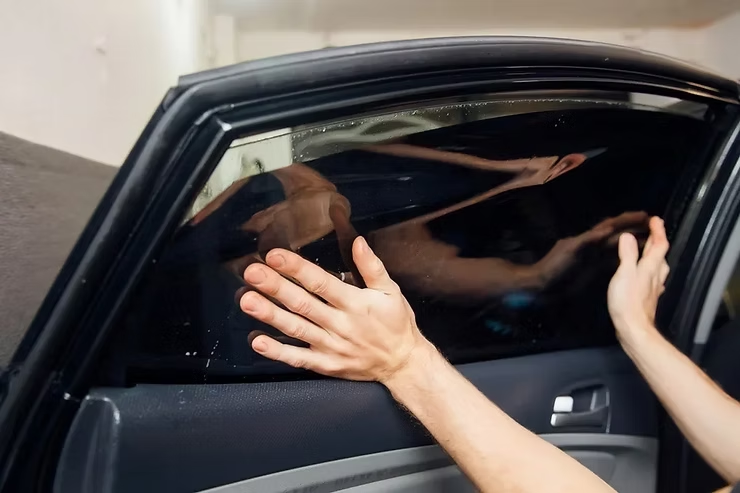
Step 4: Apply the film
Peel the backing from the film, spray the adhesive side with the solution and carefully place it on the inside of the glass.
Step 5: Remove bubbles
Use a squeegee to remove any trapped air or water. Start from the centre and push toward the edges.
Step 6: Final trim and cure time
Trim the edges neatly using a sharp blade. Avoid rolling the windows down for 48–72 hours while the tint cures.
When should you hire car window tint specialists?
While DIY tinting can save money, it’s easy to end up with bubbles, peeling edges or uneven tint shades. Professional installers work in dust-free environments, use precision-cut tint templates and ensure a flawless finish.
You should consider hiring a specialist when:
You want premium films such as ceramic or carbon
Your car has curved rear windows, which are harder to tint
You want warranty protection or guaranteed results
Specialists also understand legal tint limits, ensuring the tint complies with local regulations.
Final thoughts
Window tinting is one of the simplest upgrades that delivers impressive benefits — from improved comfort and privacy to better protection for your car interior. Whether you choose dyed film for affordability or ceramic tint for premium performance, the key is choosing the right film for your needs.
If you’re confident in DIY projects, tinting your windows can be a rewarding challenge. But if you want a professional finish that lasts, working with experienced car window tint specialists is the best option.


Comments